
Lighting With Hot-Shoe Flashes
Let's talk a bit about lighting! My brother has a food-truck, which is why he needed some product shots of the burgers he's selling. So I thought it'd be a great example to show you with a little step-by-step walkthrough how I lighted them!

The creamiest vegan burger you'll ever have. Nicely lit as well!
The gear I used was my trusty X-T1 with the Fujinon 50-140mm f/2.8, mounted on a tripod. I guess I don't need to explain why you'd want to use a tripod in a situation like this. Still if you don't know, let me tell you that you generally should use a tripod more often. It will enhance your photography. Next up: flashes!

Meet the Yongnuos. Extremely cheap but lots of bang for your buck.
For this shot I used nearly all of my hotshoe flash arsenal, which is three Yongnuo YN560 III flashes and their wireless transmitter unit, the YN560-TX. I love being able to control all the light directly from the camera! I also have the Fujifilm EF-42 for those moments I absolutely need TTL metering... which is just about never and I don't like the thing. Fuji, give us a good flash, please! For now, my Yongnuos work and if one of them fails I just buy two new ones, really. I had a Canon 600EX-RT flash and their transmitter, the ST-E3-RT. Those things would probably last forever. Then again, for the same price I can buy (at the time of writing) a Yongnuo Transmitter, that does virtually the same thing, plus eleven YN560 III flashes. It is marginally less powerfull and it feels less reliable (though mine didn't fail yet). But you have ten spares. What the eff. Ok, let's say you're a vocational photographer, which I guess most of you probably aren't, but then you'd want the most reliable flash. Go buy your camera brand's flagship flash, you'll love it. But I use them privately, my brother won't kill me if I need to swap out a flash and take 5 minutes longer for the shoot. The rest of the time I use them to shoot stuff for myself. If you're an amateur (or a pro who wants a flash kit to use only privately), I'd recommend the Yongnuos every day of the week. But enough talk, time for action!
Before the shoot, I went through the details with my brother. We decided to keep the background simple and as unobtrusive as possible. It should still work well with the general style and color scheme of the flyers, website and menu cards. He went out and bought a slate slab, the rest we decided more or less on the spot. Instead of simple white background paper we used a white brick wall in his living room and put the slate slab on a wooden board. I liked the idea of it going well together with the color of the bun.
I set up camera, board and slate slab and took a first shot:

Dark. Just how it should be!
Now don't go yelling at me. I know there's not much to see, but that was intentional, honestly! My camera's settings at this point: base ISO which is 200 on the X-T1, a shutterspeed of 1/180s and f/2.8 for the apperture. Let me explain. I went with base ISO since my subject wouldn't move that much, the burger being vegan and all. Hehe... yeah thanks. My own recipe by the way. You absolutely should have one when you're in Luxembourg! Anyway. Of course I choose the best image quality when given the option, so ISO 200 it was. I decided to shoot wide open at f/2.8 because I wanted the background to be nicely blurred out to focus on the burger as much as possible. Again, the reason simply being that we wanted the background to be athmospheric but as little distracting as possible. And finally I went with a 180th of a second, which is the X-T1's (somewhat slow) max flash sync speed. Since I want to use flashes, I couldn't go any faster than that. I didn't want to go slower either, because I needed to block out as much of the available light in the scene as possible. The reason for that is that this probably won't have been the last burger shooting I do for my brother. If we want the next burgers to look anything like the first few, it is best not to rely on the sun and the clouds being nice. Of course, food photography with soft window light can look great but if you aim to shoot a whole series of burgers and keep the same setup, make sure you can control all the variables. So rely on your own light is what I'm saying. In addition, you avoid having to deal with multiple color temperatures, which - except it being intentional - is always the way to go. So that's why the frame is rather dark-ish.
Apart from that, I already saw that I didn't like the slate slab being turned that way, so I went with a straight line. Also because the burger would have been way to small in the compostition and the even line would give me the possibility to zoom in further. Ok now, let's light that son of a bun!
One light setup. Can be nice for a cinematic portrait, not at all what I intended for the burger though.
For my lighting test images I borrowed one of the burger buns. I set up my main light to the left Of the frame and left the flashhead bare for the moment, immediately realizing that this was not the light I was looking for. This can actually be a very nice portrait light, sometimes even with a grid on the flash to control spill light even further. But here it just wasn't the look I wanted, so I went with a 5 foot shoot through umbrella. This would not only soften the shadows on the burger, it would also bring up the ambient light level quite a bit. Now, because I only have three flashes and because I already knew I'd use the two remaining units for other purposes, I put a big silver reflector to the right of the frame, so I wouldn't need a secondary flash for that. Here's the resulting shot:

That's better, just like some nice window light!
We're getting into the ballpark there! First thing you should notice next is the exceptionally dull gray background. But I chose that wall for a reason! I put my second flash unit behind the burger on the floor, directly against the wall with the head pointing to the ceiling. Like that the light would streak the brick wall, accentuating the structure and bringing it to life.

Some structure in the background but not too much. Gives some needed balance to the picture.
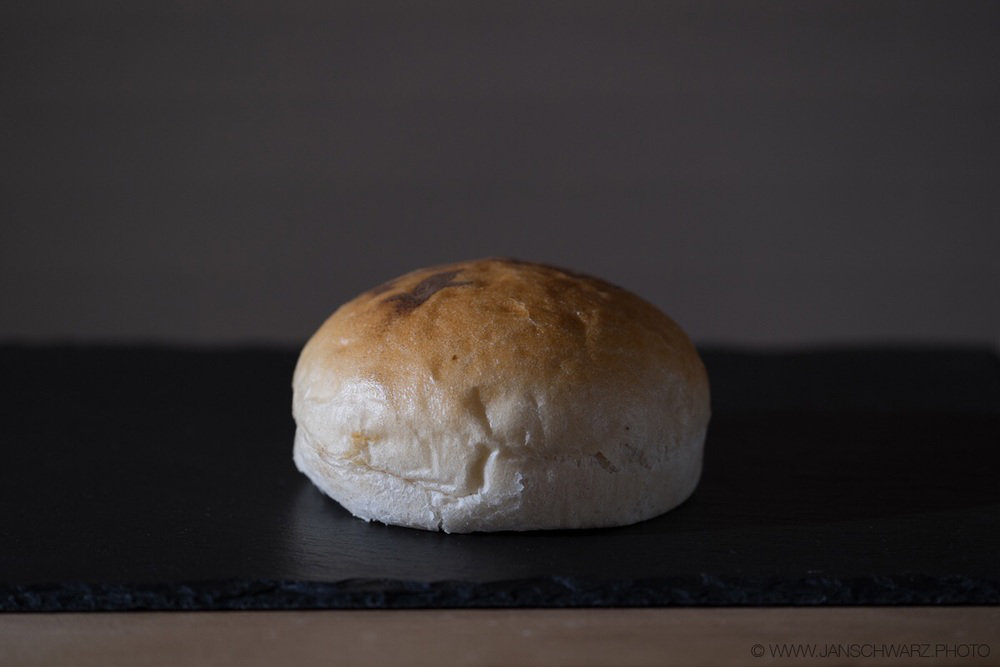
Now we're talking. Discreet enough, not distracting from the burger, but way less boring than just a gray backdrop. Now there's only one thing missing (beside the real burger of course). My third flash would go on a lightstand, just outside of the frame to the right, about 3 foot behind the bun, pointing towards it. This would create a nice back light, giving the picture more depth and adding some volume. This also works wonders if you want to add some life to a rather flat portrait light. The main light being on the left side, a highlight on the right edge balances it out.

Rim light gives your subject separation from the background and makes it less flat.
For this picture I put a little grid on the flashhead. This also added some unwanted shadow lines to the front. To get rid of those I used another modifier: a little hot-shoe flash beauty dish with a white shoot through reflector. I seldomly use it but in this situation it did exactly what I wanted it to: smooth out the shadow lines but keeping the rim light on the burger.

Changing modifiers can make a huge difference. Here, the shadow just looks nicer this way.
Much better. So, that is some nicely balanced light! You could call it flattering, for a bumpy bun like that! Sorry, couldn't resist... But the lighting part is done! What followed was the assembly, teardown and reassembly phase of the actual burger. I'm by no stretch of the imagination a food designer but I think the construction we came up with is fairly presentable:

A completely assembled vegan goddess. I'm no food stylist but I think this turned out quite nicely!
And here, after the digital make-up session:

And the rest, as they say, is Photoshop history.
And there you go! A lot of the lighting principles here can be applied to shooting headshots as well. Always keep in mind: light is never bad or of poor quality. It's just a matter of using the appropriate light for the right situation. Sometimes one light is all you need where three lights would just kill all the atmosphere, other times you can't have enough light sources. A good reason to buy a bunch of cheap flashes to throw around! Let me know in the comments if you have any questions or if this was of any help to you! If you like what you see, thanks for sharing it on your networks!